
Showing posts with label tutorial. Show all posts
Showing posts with label tutorial. Show all posts
Monday, August 1, 2016
Thursday, April 3, 2014


Thursday, June 6, 2013
Taco Tutorial

These south of the border inspired treats were so easy peasy I thought I'd throw together a little taco tutorial for you. I started with a circle cookie cutter to cut out half the number of tacos I would need and then took a sharp paring knife (Exactos are great for this, too) to cut them half giving me a perfect taco shell semi circle.

Using golden tan colored royal icing, outline your semi circle starting in about a quarter of an inch from the cookie's round edge to leave room for all those yummy taco fillings.

Fill in taco shell.

Working from the background to the foreground with your taco fillings, add random jagged lettuce in soft green royal icing.

On top of the lettuce and closer to the taco shell pipe the ground beef in dark brown royal icing.

Fill in any gaps with diced tomato squares in red. Try to pepper them in randomly to give them that natural taco look ;)

The last ingredient is shredded cheddar cheese in light yellow orange icing piped in thick half inch lines going this way and that. You really can't screw these up.

The final touch is to clean up the taco shell by outlining the top arch with the same golden yellow icing you began with. Aaaand... ole! Tacos por todos!
Friday, May 3, 2013
RI Transfer with Brushed Embroidery Tutorial. Kind of.

These pretty flowers were made using a brushed embroidery technique on royal icing transfers. Learn how with the tutorial I did on Sweet Sugar Belle's site here. Enjoy!


Wednesday, March 27, 2013
Cake Wreck Recovery

I look at a lot of pretty party blogs and think, "Man, these mamas have got their stuff together!" They probably aren't scrambling to hide junk in their bedroom as guests are coming up the walkway. They probably aren't yelling at their kid with empty threats of, "Stop CRYING or I will cancel your party!" They probably even get in a shower before putting on a perfectly tasteful strand of pearls.
But maybe I'm wrong. Maybe they're more like me than I think, they're just not 'fessing up to the madness behind the tissue poms. I know all the party blogs and Pinterest boards can make even the best hostess feel a little deflated and insecure. Is it enough? Are mustaches in or out? Where can I get chevron paper straws for my mason jars? Trust me, I get swept up in the trends, too. It's fun! And I love throwing parties. But truth be told, it is ugh-lee up in here up to the very last second. I am a sweaty, smelly stressball making mad dashes to get everything ready: setting up tables, finishing last minute touches, cleaning up after a tornado of chaos, etc. I'm going to expose the ugly truth about the behind the scenes craziness that goes into those perfect parties you see in the blogosphere with a little story to make you feel better if everything doesn't go just right at your next soiree.

Sooooo. Y'ever have a baking day like this?
This triple decker beauty was for a party I was hosting later that afternoon. Like in 2 hours guests would be arriving. Crap! This was going to be a gorgeous flower covered centerpiece on the buffet table for my kiddo's tiny Spring Fling party. I don't know what went wrong because I bake these kinds of cakes all of the time. I DID forget to grease the sides of the cake pans, which gave me some torn up sides. And then one of them cracked down the middle. And then it all just crumbled and fell apart when I tried to stack the layers. Yikes. What's a hostess with guests on the way to do?

STEP 1: Head to the grocery store! My Vons had some simply decorated, double layer carrot cakes for $9.99 a pop. This juuust might work. I picked up two of them and rushed home to Frankenstein them together.
STEP 2: Stack the cakes. I happened to have a cardboard cake round and some plastic drinking straws to cut up and insert in the bottom cake as supports.
STEP 3: Scrape off the "carrot" globs.
STEP 4: Scrape off the coconut flakes, fill in the separation between the stacked cakes and break up the crusted over frosting.
Then get ready to go royal icing transfer CRAZY:

This was the original idea for the cake I wanted to make, only it turned out a bit larger than I initially planned. I had premade all of these royal icing flowers, so I just started pressing them into the sticky frosting, layering the smaller ones on top to cover any gaps. This was going to work! Crisis averted. Almost.

Top view

Back view. Ok. Hold up. This is not cute. Of course I didn't have enough flowers to cover the whole cake. (Did I mention the store cakes were a bit larger than I had originally planned for?) Luckily this wasn't for a client and my party guests like a good laugh! And I could turn this side towards the wall to hide it. Thankfully it all worked out in the end. Whew!

From disaster to delightful in 20 minutes!
Sunday, August 19, 2012
Tutorial: What A Difference A Dot Makes

I was working on an order for five dozen mini makeup cookies and decided to keep it simple.

The problem with keeping it simple is there's not a lot of smoke and mirrors to distract you from any flaws. Like imperfect circles for instance. My quick fix for wonky circles? Camouflage the crap out of them with a decorative dot border. Check it out.

This little blusher = wonky city.

To correct shape add evenly spaced dots using a number 1 tip so they create a more perfect circle shape. Let dry.

Come back with your number 1 tip and fill in blank spaces. Booya! Perfect-er circle with a decorative border.

Add a pretty little heart detail and you're in business.
Sunday, July 29, 2012


Monday, May 14, 2012
Having Faith - Character Cookie Tutorial

I'm no character cookie veteran, so it always makes me cringe a little when I get an order for them. But I have learned one thing, you've got to break a few eggs to make an omelette. What I mean is, it's going to look terrible before it looks good.

Exhibit A: Real Mermaid of Orange County
You've seen her at South Coast Plaza or down at Newport Beach; the heavy eye makeup, the weirdly drawn in eyebrows, the blown out lips. It's a little unnatural and off putting. It's a character cookie before its "skin" has been filled in, and it makes me nervous EVERY TIME.
I've figured out that I need to use a number 2 tip to out line the facial features because the skin tone is going to "eat" into my drawing on either side of the linework, making the lines much smaller and finer (sometimes disappearing all together because my icing consistency is off just a hair and too runny - grrr...).

Better.
Next step is the fun one as the character finally starts to look like her old self. I go in and fill with a gooey (not runny) icing consistency, using a number 1 tip to help me keep definition in the smaller areas. I start in the largest area and work towards the small delicate spaces. In this case, I started with the chest and shoulders, up the neck and then sloooowly and carefully around the facial features. I try not to ice right up to the features because I know the icing is going to settle and touch them on its own. If I piped it right up to the mouth, I might lose the entire top lip (as you can see I lost a lot of my black eye outline). I don't, however, want any gaps so I might work the icing to touch my outlines with a toothpick if they need some coaxing.

Final product.
This part I haven't perfected either, but I think a little bit of detailing (chin line, nose, shoulder) helps bring her to life. And there you have it. My take on character cookies. With more practice, they can only get better!
Thursday, March 15, 2012
Edible Spyglass Tutorial

Arr Matey! I think we actually came up with an original idea this time. (Very difficult these days! Sometimes you THINK you thought of something and *bam* THERE it is all over Pinterest.) These Spyglass Surprises are super fun and simple to assemble, and have a bonus treat inside for the kiddos. Here's the how-to. Enjoy!

Your shopping list: Store bought short bread rounds (to ensure uniform size) pre-iced, cake-style ice cream cones, surprise goody of your choice (I used lemon drops I had on hand, but M&M's, Skittles or any other small candy would work as well), Rolos chocolate caramel candy, and royal icing.

Decorate your short bread with whatever scene you'd like to see through your spyglass - I chose a desert island scene with an "X" marks the spot. Then use a thin layer of bronze colored royal icing along the outside ridge of the cookie and add a small dotted border around your scene image.

Fill ice cream cone with surprise goodies. (You could also fill the ice cream cones with cake batter, bake and cut off any excess "muffin top" so you have a level top.)

Run a bead of semi-stiff royal icing in the same bronze color as used on the edge of your short bread cookie.
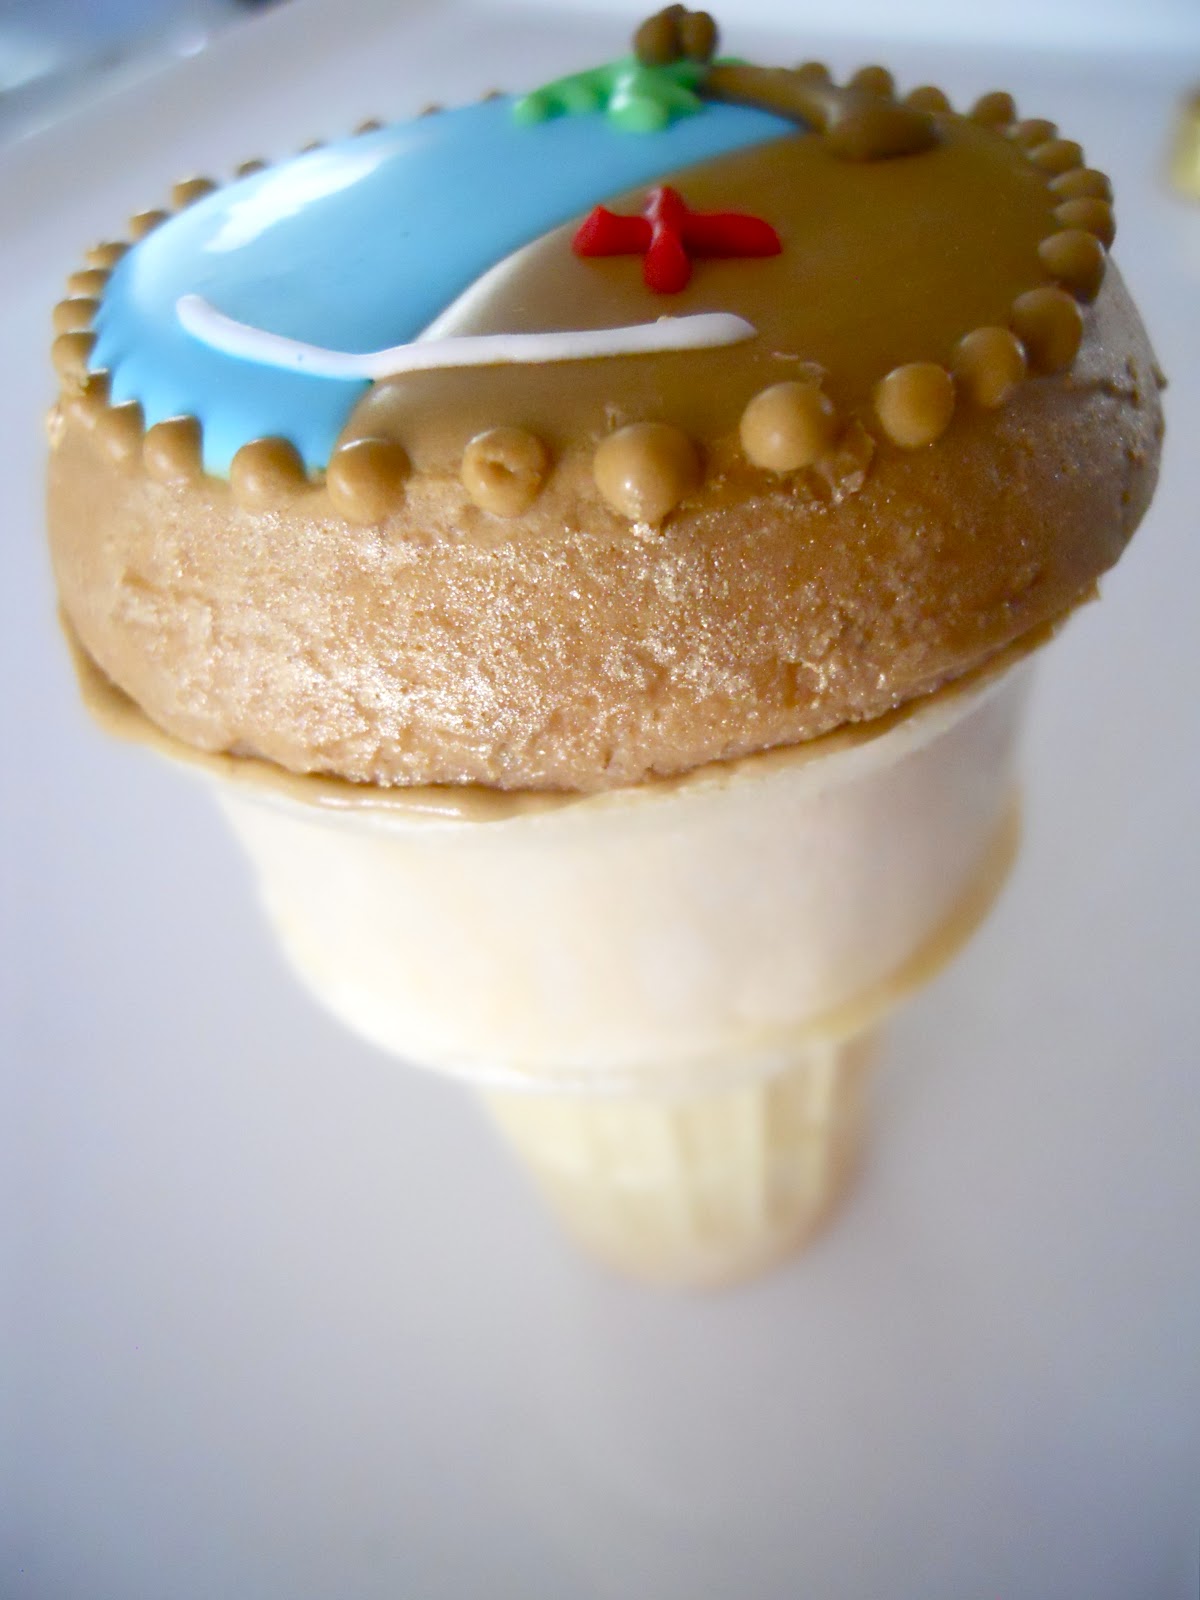
Attach cookie to ice cream cone, pressing gently but firmly. Run your finger around the edge to wipe away any excess icing and to form a clean seal.

Camouflage seal with second border of dots.

Squirt royal icing glue on bottom of cone.

Press a Rolo onto the bottom of your cone.

Gently turn upside down and allow to dry.
Voila! Neat treats for your favorite scurvy sea dogs.
Monday, February 20, 2012
Royal Icing Henna Transfers

My partner in crime, Ryam, from The Inspired Mama, and I are throwing a Princess Jasmine inspired party for her soon-to-be five year old, Samirah. We're both not too keen on the whole licensed character bit, so Jasmine will be making a minor appearance in the form of some sugar cookies on the dessert table. So I guess it's really more Arabian Nights than Jasmine we're talking about. In trying to come up with some fresh ideas, I started playing around with henna tattoos and how I could incorporate them into the dessert table. That's when I started making these henna royal icing transfers to use as a major-wow cupcake topper. Below is the surprisingly simple step by step tutorial. Enjoy!

Start with a line drawing of your design. I took an image I'd googled then finessed it to fit the shape and size I needed it.

Place a sheet of wax paper over your paper template and start tracing your design using semi-stiff royal icing in your piping bag fitted with a number 1 tip. Make sure to have some thicker sections for stability. I went over some lines twice to build them up. Also be sure to connect all lines to another point of your design so it is more sturdy when peeling off your wax paper.

Keep building and adding on.

You can use a heat gun to speed drying time.

When completely dry (COMPLETELY - no cheating) begin removing your transfers by slowly peeling back a small section from the wax paper. Don't go too far or the pressure of your fingers are likely to break your work and induce a steady stream of curses.

Using a large offset spatula, slowly start working your design off the wax paper by sliding it under the transfer at the starting point you created by peeling it away from the wax paper. Use a smooth steady motion and watch your spatula to see if it is catching on any of the design elements. This is easier than you might guess. I only had two tragedies and one was completely salvaged by putting the largest chunk back on the wax paper and re-piping the missing part. I just let it dry and removed as described above.

And there you have it. Beautiful lacy royal icing pieces to use as appliques on cakes, or in my case tall, standing cupcake toppers. Obviously, you can pipe in any color you like or take it to the next level and give them the Midas touch:

I love this stuff BUT it's kinda pricy ($9.99 at my cake supply store) and does not go as far as I would like. I chose the spray because I worried about painting with a brush on such a delicate canvas.


How pretty would these be in white used on a pale vintage-inspired lace cake? Hmmm... Think I'll have to add that to the "must try" list.
Subscribe to:
Posts (Atom)